De-Great Yartey
Lead Experience Developer
Last updated yesterdayHow to add products
How you present your products matters. It contributes to how your customers can find products easily (on your site) and interact with them (add to cart, etc.). So we provide an intuitive, easy-to-use interface for adding and editing your catalog. However, there are some concepts to understand when thinking about your products. We talk about those concepts next.
Categories
The first concept we talk about is Categories. At first glance, it appears simple when grouping your products on your site. This will be true if you sell only a few set products.
On Adeton, categories are presented as a single hierarchy. That is, there no [concepts] of sub-categories. Therefore when dealing with lots of products from different brands, it may be hard deciding whether to use brand names or item types.
For example, when selling footwear from Nike, Adidas, Reebook and locally made footwear, you're also confronted with different footwear types like Official, Sneakers, Runners, Skateboarders, etc.
A simple rule to consider when choosing is does the count keep the customer engaged? For instance, if you have very few items under each brand, this gives customers a very short engagment time when under a Brand's category. However, if you do have lots of items (from different brands) under Sneakers type category, it keeps the customer scrolling through options on your site.
Variants
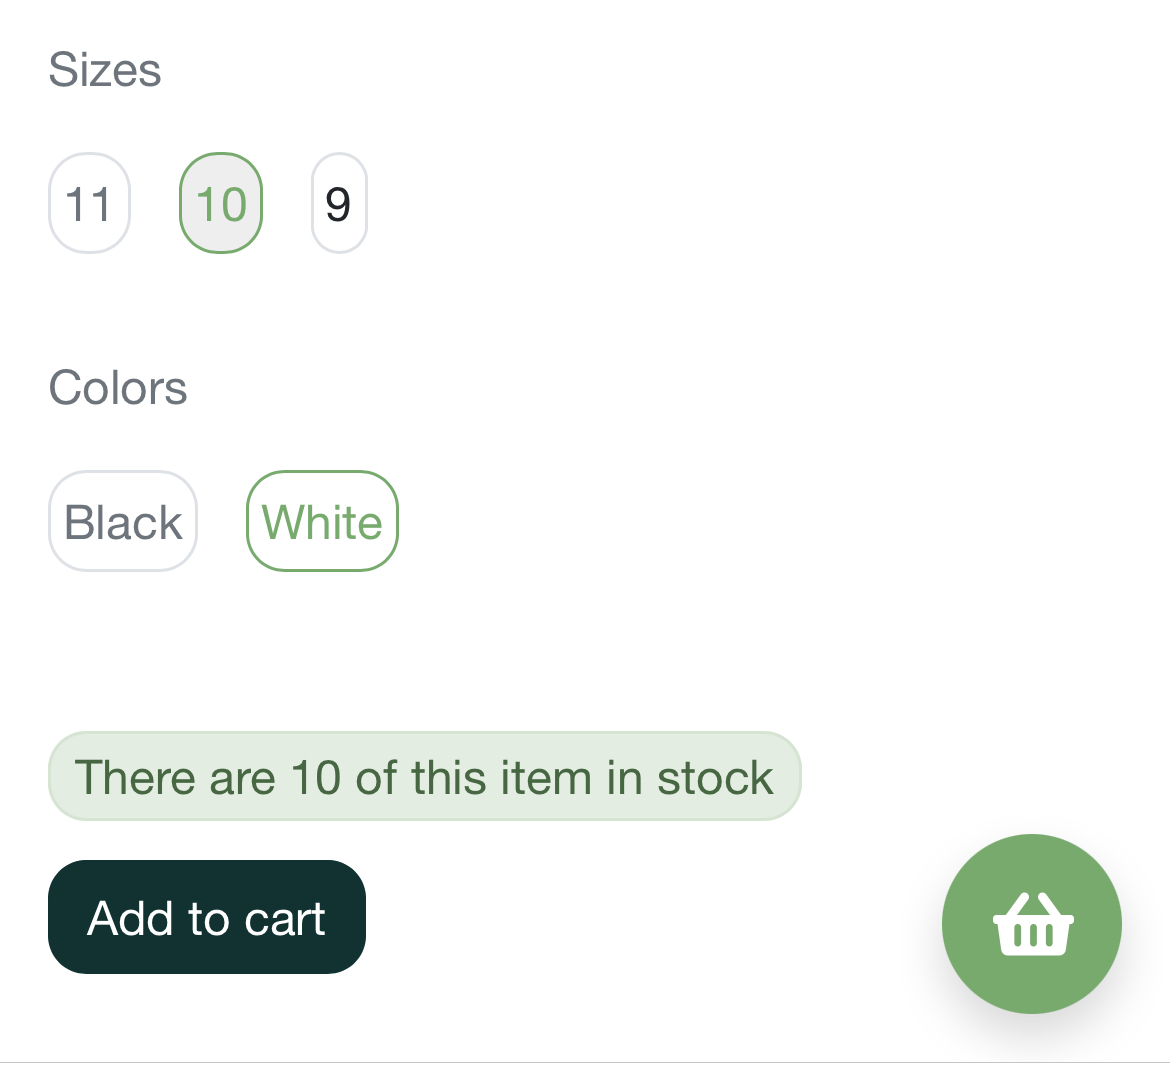
Still using footwear as an example. They have different sizes. Sizes are a type of variant. You could also have different colors for the same model of a footwear. Adeton offers 4 types of variants: Size, Color, Flavor and Grade.

Adding products
Now that we understand these concepts let's look at the various fields required when adding a product.
Title
Keep it simple and descriptive so that when customers make a search, they can find it easily.
Category
This is a required field. Select the category that this product belongs. If it doesn't you can tap the drop down and select Add new category. You can then select a
Price / Sell at
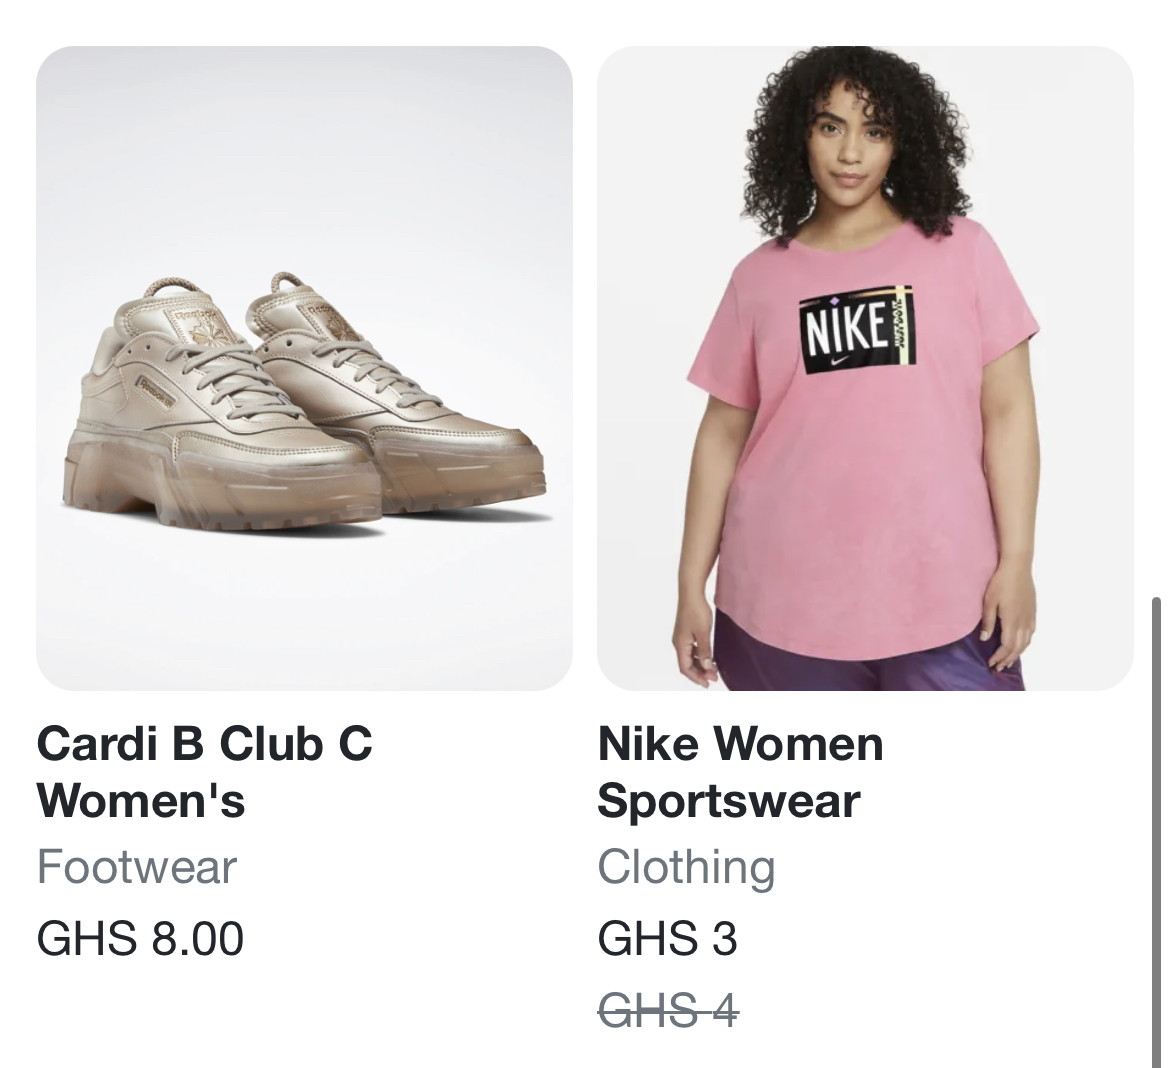
Enter the correct selling price of the product in the Price entry. It's optional to provide the Sell at value. Note that, when you provide a Sell at value, the product will charged at that price. Therefore, the Sell at value should be used to indicate a discounted (lower) price. The following images demonstrate how a product is displayed on your site with the Sell at present or absent.

Images
You can select up to 10 images to provide visuals for the product. However, the first image will be used as the product's thumbnail.
Variants - Features
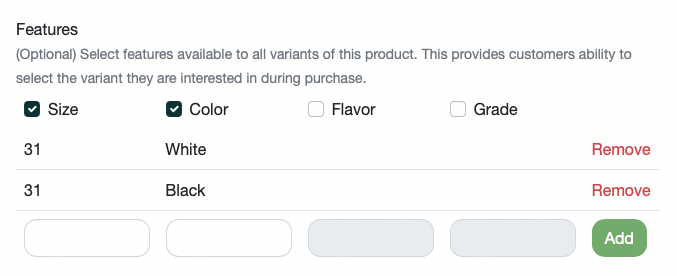
First select the features that make up the product's variants. For example, if a shoe can be selected with size and color, enable the Size and Color features. After doing this, the fields for providing the values get enabled.
Enter each feature combinations (separately) and tap Add. That is, if you have this product (shoe) has sizes 31 in both black and white color variants, you provide the variant selection as demonstrated in the image below:

Note that, you don't have to enable features and provide variants for every product. This is optional.
Inventory
The inventory section is used to track stock. If the product is something you can prepare on demand and does not necessarily get reduced when purchased, you can turn off Has limited stock.
If the product has limited stock and has different variants already supplied (above), you'll need to provide the count for each variant.
If the product does not have any variants, you can simply provide the count.
This becomes helpful when customers place orders. It makes sure they cannot order more than you have in the inventory.
Available
If you do not want a product to appear on your site but keep it in your inventory, just check this field off. Leaving it on will make it available for purchase if it's still in stock.
We hope this tutorial was helpful in uploading your products. If you have extra questions not addressed here, reach us on our socials or by email or telephone.